
When it comes to polishing your own countertops, it can seem daunting. But fear not! Bonastre System has made a revolutionary polishing kit that makes polishing your kitchen counter, bathroom vanity, a table, your beautiful marble travertine or limestone shower, or even your bathroom floor as easy as 1, 2, 3, 4! The Magic Renova 5in Flexible Drill Kit is the easiest solution for polishing hands down.
Why is Bonastre’s Stone Polishing kit the Best Choice?
- Superior Performance: The Magic Renova Drill Kit is designed to deliver exceptional results. Its innovative design allows for efficient and effective polishing, leaving your countertops looking brand new.
- Easy to Use: Anyone can achieve professional-quality results. Simply attach the flexible attachment to a drill, follow the easy step-by-step instructions, and let the kit do the work for you.
- Versatile: Whether you need to polish a countertop, a shower, table or bathroom vanity Bonastre’ s 5in Magic Renova stone polishing kit makes it easy to get the job done.
Step-by-Step Guide to Achieving a High Gloss Finish
Step 1: Prepare the Surface
Before you begin the polishing process, make sure the surface is as clean as possible. Using a stone safe cleaner such as Stone and Glass Scrub will remove soap scum and hard water deposits. Allow the surface to dry completely before proceeding to the next step.
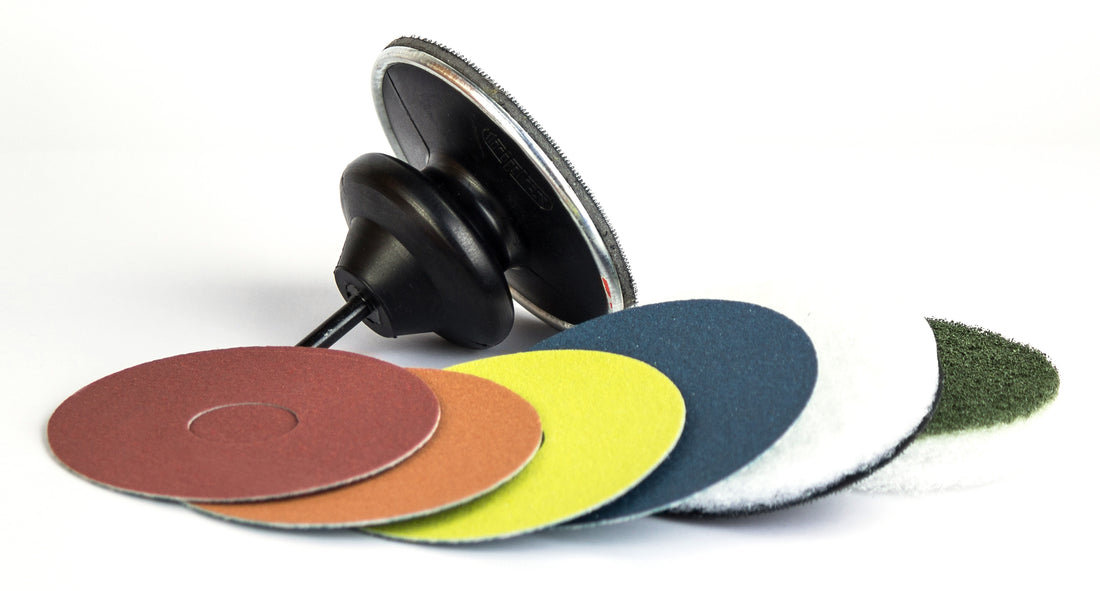
Step 2: Start with the Red #1 Disc
Attach the Red disc to either a handheld polisher or Bonastre’ s flexible drill plate and add clean water to the surface of the stone. The Red disc helps to remove any etching or imperfections. Begin the polishing process by gently moving the polisher in counterclockwise motions over the surface. After completing 5 to 6 passes it is important to inspect the stones surface to ensure it is even and the blemishes have been removed. Repeat as needed until the surface is an even matte finish. *This kit will not remove deep scratches or chips in the stone*
Step 3: Repeat the process with discs 2, 3 & 4
Once you have an evenly matte finish, continue with steps 2, 3 and 4. Repeating the same counterclockwise motion polishing technique, gradually working your way through the finer grits. Each disc builds upon each other to achieve a smooth consistent finish.
Step 4: Final Polishing with the Green Pad
After using each of the 4 sanding discs, it's time for the final polishing stage. Attach the green pad to the polisher of choice and apply clean water to the stone’s surface. Gently move the polisher in circular motions being sure to go counterclockwise, ensuring even coverage over the entire surface. Complete 3-6 passes to create a high gloss finish.
Step 5: Clean and Inspect
Once you have completed the polishing process, clean the stone’s surface. We recommend using Easy Oxy to ensure the stone is free of residues. Inspect the surface from different angles to ensure a uniform and glossy finish. If necessary, continue using the green polishing pad to achieve the desired results.
If Desired, apply a sealer to your stone to aid in preventing stains on your freshly polished surface. Pro Sealer or Barrier are great sealants that are simple to apply.
For the Visual learner we have several instructional videos!
Check them out below!
Countertop Polishing with 13in Minitop & Magic Renova
It is important to remember that every stone is different and results can not be guaranteed. This kit is not for use on granite surfaces.
Should you have any questions please feel free to give us a call or send an email!
623-444-4263
customer.care@cleancenter.com